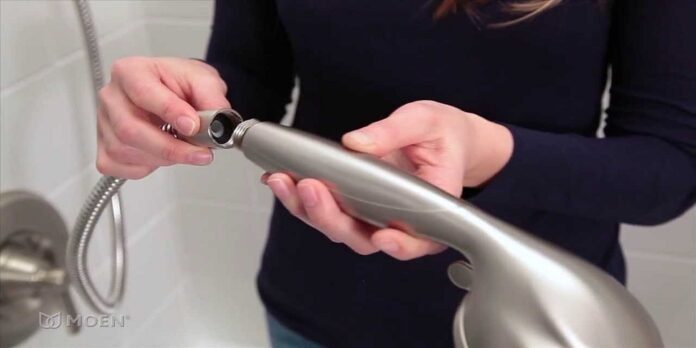
You’ll undoubtedly need to replace your shower head, whether you’re remodeling your whole bathroom or swapping out old, inefficient plumbing fixtures for efficient alternatives.
This blog post outlines the step-by-step process for installing new shower heads on remodeling bathrooms and adding new fixtures and you will be able to fix shower head in your bathroom without any plumber’s help.
Before installation, the basic step is to purchase a new shower head. If you are searching about buying a detachable shower head, Declinko is a perfect option for you to buy the best shower heads.
You may start changing your previous shower head and installing a new one now that you have all the necessary tools and are fully prepared.
Equipment You Need
- Adjustable wrench
- Drill and bits (if needed)
- Hex key
Materials You Need
- Plumber’s pipe-seal tape
- Tub spout with diverter (as needed)
- Hand-held shower head kit
- A piece of heavy cloth
Steps of Installation
1. Remove the previous Shower Head
Knowing how to remove a shower head is a prerequisite for the first stage of this shower head replacement project. Check whether you can remove the old fixture by hand by turning it over several times counterclockwise.
To prevent damage when you hold onto the shower arm with slip-joint pliers, wrap the cloth around the pipe that runs from the shower head to the wall. After that, secure the adjustable wrench around the base of the skull and turn it off counterclockwise until the arm is free.
2. Clean the Thread
After removing the previous shower head, you can discover debris on the flexible shower hose’s thread end or on the shower arm that protrudes through the wall. Use a wire brush, an old toothbrush, or a damp paper towel to clean the threads. Before moving on to the following step, ensure they are clean and debris-free.
3. Creation of a Water Seal
Remove the shower head and wrap several layers of tape around the shower arm threads. Strongly press it into the threading. When you find a leak during routine use, replace this tape, which serves as a water-tight seal between shower arm and shower head that you are fixing.
4. Fix the New Head
You can now attach the replacement shower head after taping. Please read the product’s instructions before moving on to this stage because they will vary based on the product you’re installing.
Onto the threads, manually tighten it clockwise. When it is stable, turn it a quarter turn tighter. If required, carefully pull the shower head using the wrench and a piece of cloth.
5. Look for Water Leaks
Before putting the tools away after installing the shower head, ensure no leaks. Check each connection for any signs of water seeping. They all ought to have thread-sealing tape and will most likely not leak.
Conclusion
As you can see, patience and time are the two most important things you need to learn to install a shower head. Although it’s not the most straightforward task to finish, the end product is worthwhile. We wish you good luck with this advice and lovely shower outcomes!


